ScreenConnect / ConnectWise Control
ConnectWise Control Integration
Info
To make this work you will need the exact name of the windows service from one of your agents running a ScreenConnect Guest.
Info
You can setup a full automation policy to collect the machine GUID, but this example will collect from just one agent for testing purposes.
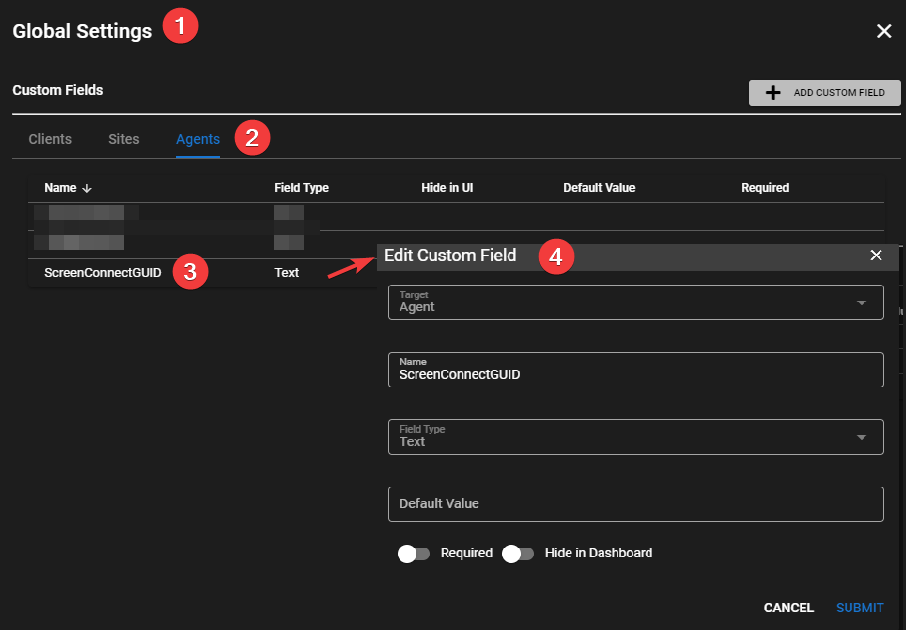
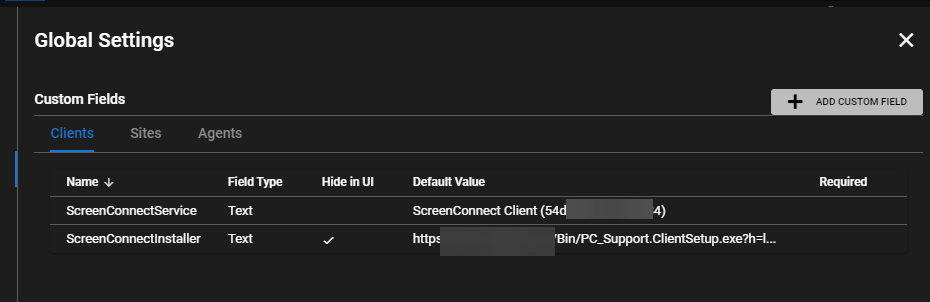
From the UI go to Settings > Global Settings > CUSTOM FIELDS > Agents.
Add Custom Field:
Target = Client
Name = ScreenConnectService
Field Type = Text
Default Value = ScreenConnect Client (XXXXXXXX) (make sure to copy paste the exact windows service name here)

Add Custom Field:
Target = Agent
Name = ScreenConnectGUID
Field Type = Text
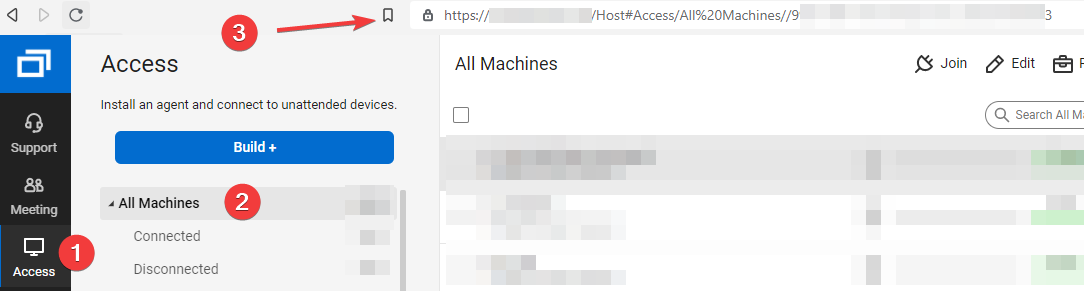
While in Global Settings go to URL ACTIONS
Add a URL Action:
Name = ScreenConnect
Description = Launch Screen Connect Session
URL Pattern =
https://<your_screenconnect_fqdn_with_port>/Host#Access/All%20Machines//{{agent.ScreenConnectGUID}}/Join
Navigate to an agent with ConnectWise Service running (or apply using Settings > Automation Manager).
Go to Tasks.
Add Task:
Descriptive name of task = get screen connect GUID
Collector Task = CHECKED
Custom Field to update = ScreenConnectGUID (Agent)
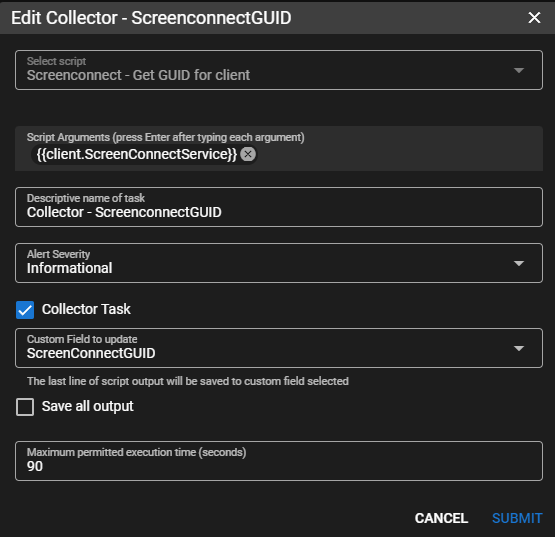
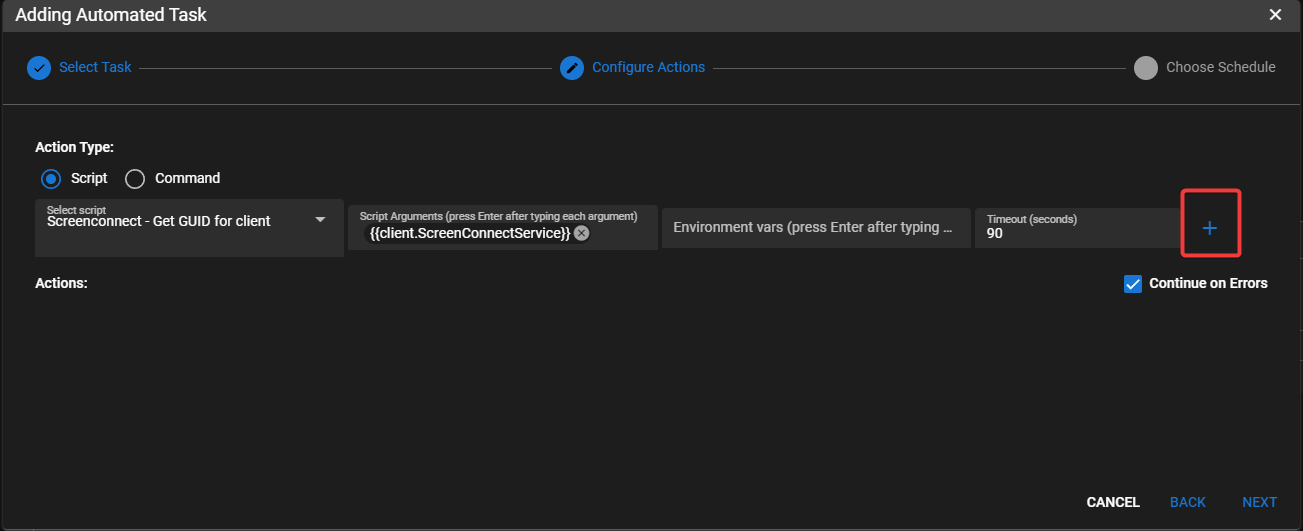
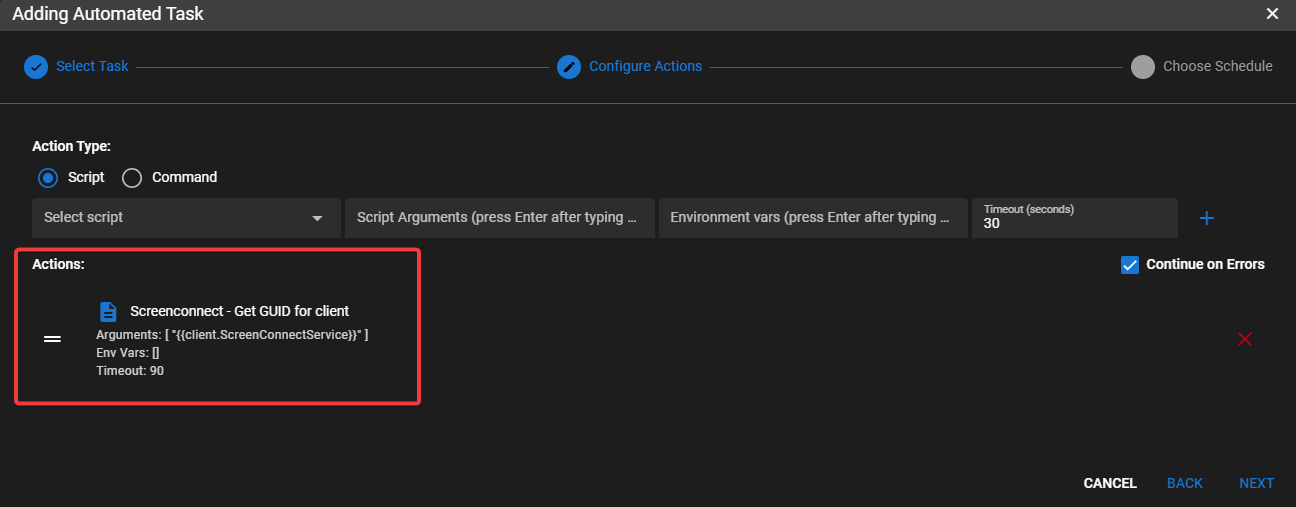
Click Next
Select Script = ScreenConnect - Get GUID for client (this is a builtin script from script library)
Script argument = {{client.ScreenConnectService}} (it should auto-fill)
Click the plus sign
Choose a schedule for the collector to run then add the task.
Once the task has synced with the agent, right click on the newly created task and click Run Task Now.
Give it a second to execute, refresh the tasks tab and then check the output of the task and make sure you see a GUID.
Right click the agent that you are working with and go to Run URL Action > ScreenConnect.
It should ask you to sign into your ConnectWise Control server if you are not already logged in and launch the session.
Install ScreenConnect via Tactical
Use the ScreenConnect AIO script
Install Tactical RMM via ScreenConnect Commands Window
- Create a Deployment under Agents > Manage Deployments
- Replace
<deployment URL>below with your Deployment Download Link.
#!ps
#maxlength=500000
#timeout=600000

Invoke-WebRequest "<deployment URL>" -OutFile ( New-Item -Path "c:\ProgramData\TacticalRMM\temp\trmminstall.exe" -Force )
$proc = Start-Process c:\ProgramData\TacticalRMM\temp\trmminstall.exe -ArgumentList '-silent' -PassThru
Wait-Process -InputObject $proc

if ($proc.ExitCode -ne 0) {
    Write-Warning "$_ exited with status code $($proc.ExitCode)"
}
Remove-Item -Path "c:\ProgramData\TacticalRMM\temp\trmminstall.exe" -Force